A first glance at Copilot Studio
What cool new features does Copilot Studio brings?
AI
Copilot
Ignite
Disclaimer: This blog post is not AI generated and entirely handwritten 😉
Copilot for Microsoft 365 is a great tool to increase your productivity and creativity. But what if you want to use Copilot for Microsoft365 beyond your proprietary data? Well, then you can use a Copilot action (formerly known as a Copilot plugin).
But what if there’s no out-of-the-box plugin available for it? Well, we’ll just make it ourselves! And you can do that with Copilot Studio!
Copilot Studio is the descendant of the former Power Virtual Agents, which allowed you to create chatbots for use within M365 or externally on your own website. Copilot Studio takes this a step further and lets you create Copilots in addition to chatbots. Copilot Studio is part of Power Platform. For example, you will see that when you create a Copilot plugin, or rather a Copilot Action, they are part of a solution. If you were to go to the solutions in Dataverse, you will see the solution for your Copilot Action listed there, along with its components.
Before I explain to you how you can create your own Copilot action, I would like to give you a word of explanation about the different Copilot Actions you can make, because there are 4 types at the time of writing. This way you can better understand the differences and make a clear decision in which one suits you best:
Ok, let’s take a look at how to create a connector Copilot action. I used the following things to make these:
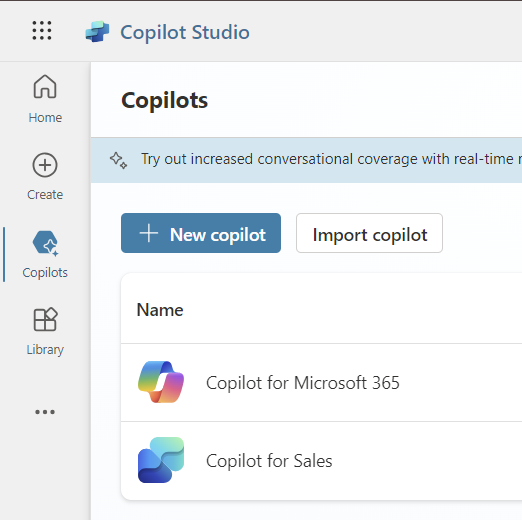
First let’s go to Copilot Studio, click on Copilots and then on Copilot for Microsoft 365
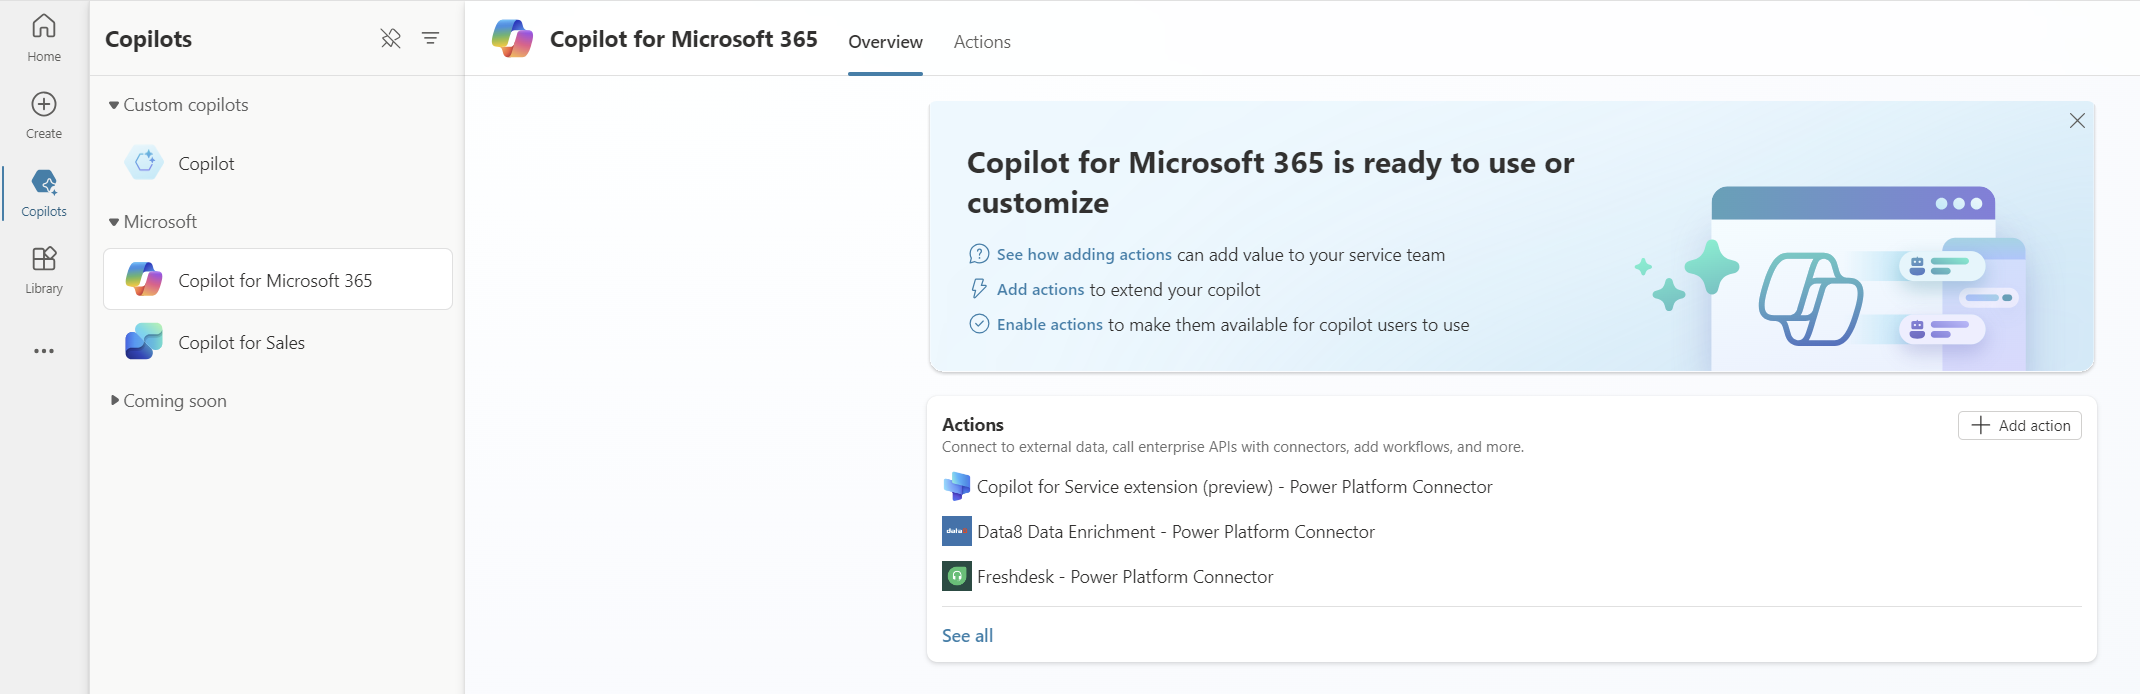
Next, click on Add action (all the way to the right)
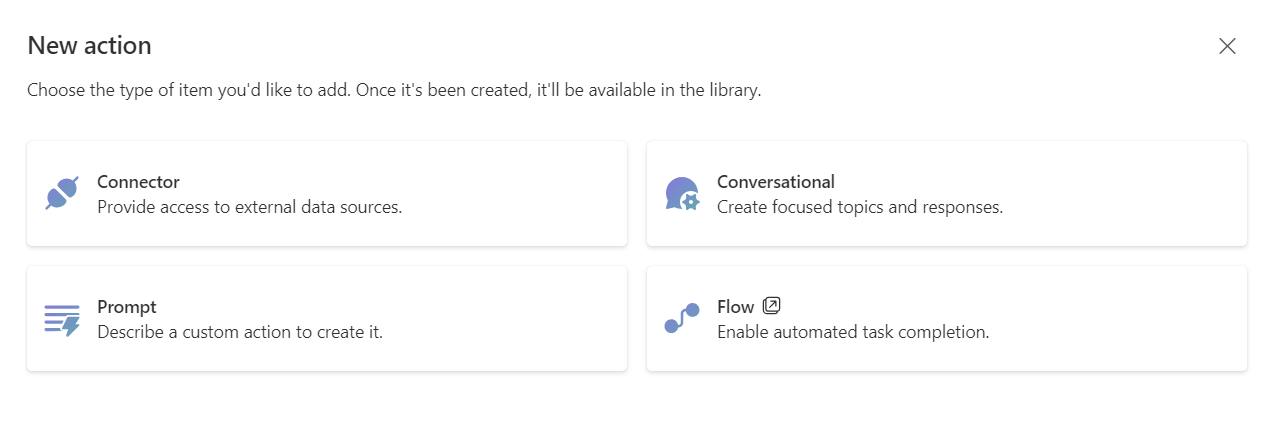
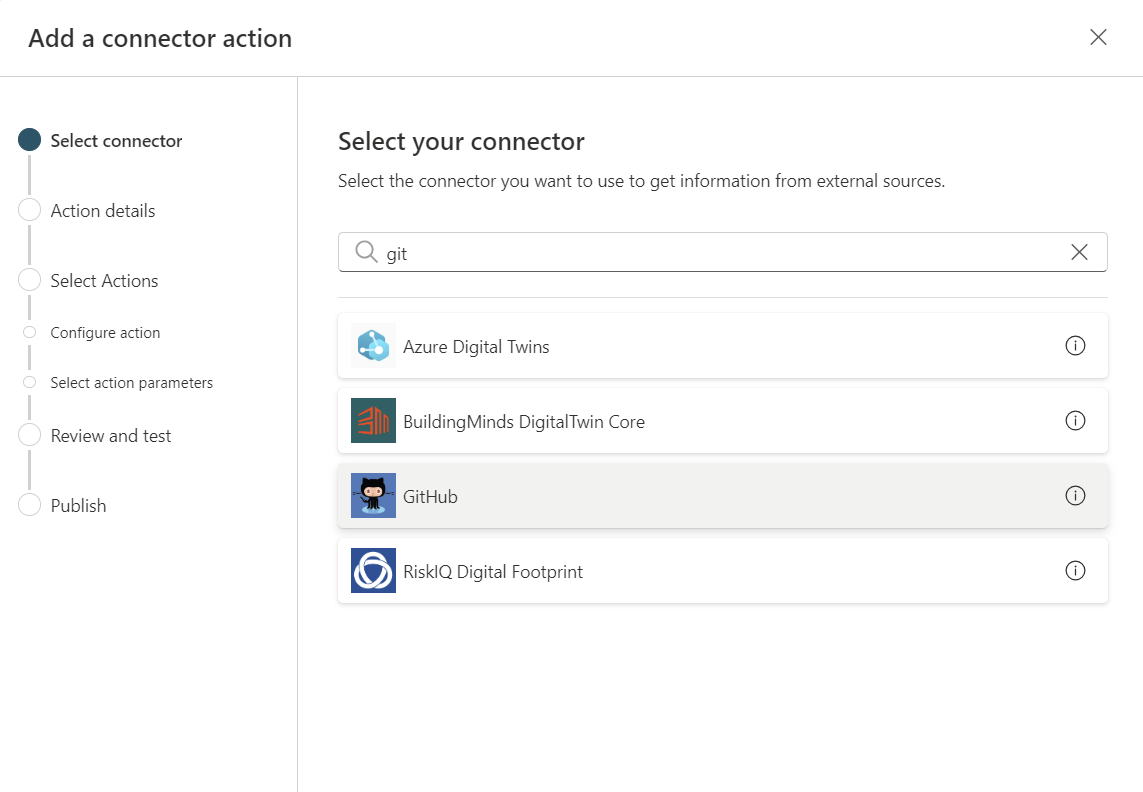
After that we will see the following screen where you have the choice between the 4 types of Copilot actions. Let’s click on Connector.
Now you get a list of a lot of predefined connectors. For this one, I wanted to check whether I could connect to external data that is not in M365. For example you can use the OneDrive connector or SharePoint connector, but as I wanted to use external data, i chose for GitHub. After you selected your connecter, click on Next
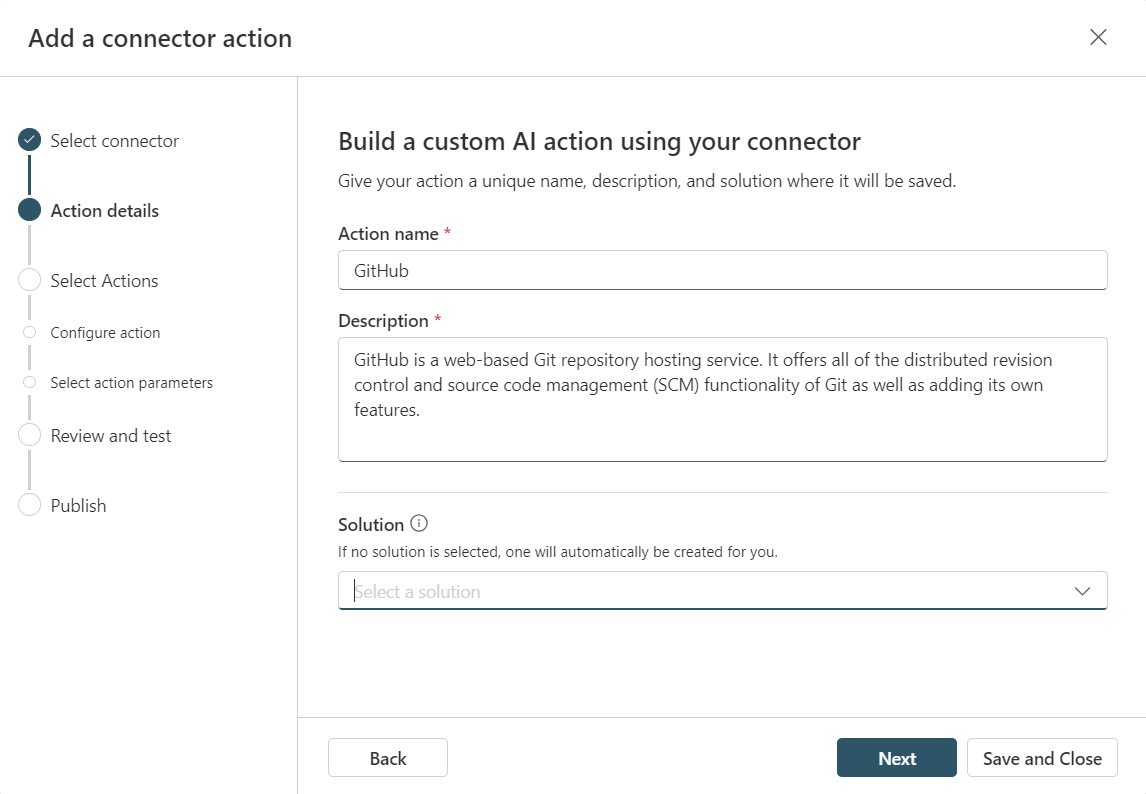
In the following screen you can chose the name for your Copilot action, a description and whether you want to add it to an existing solution or not. If no solution is selected, then a new solution will be created for you.
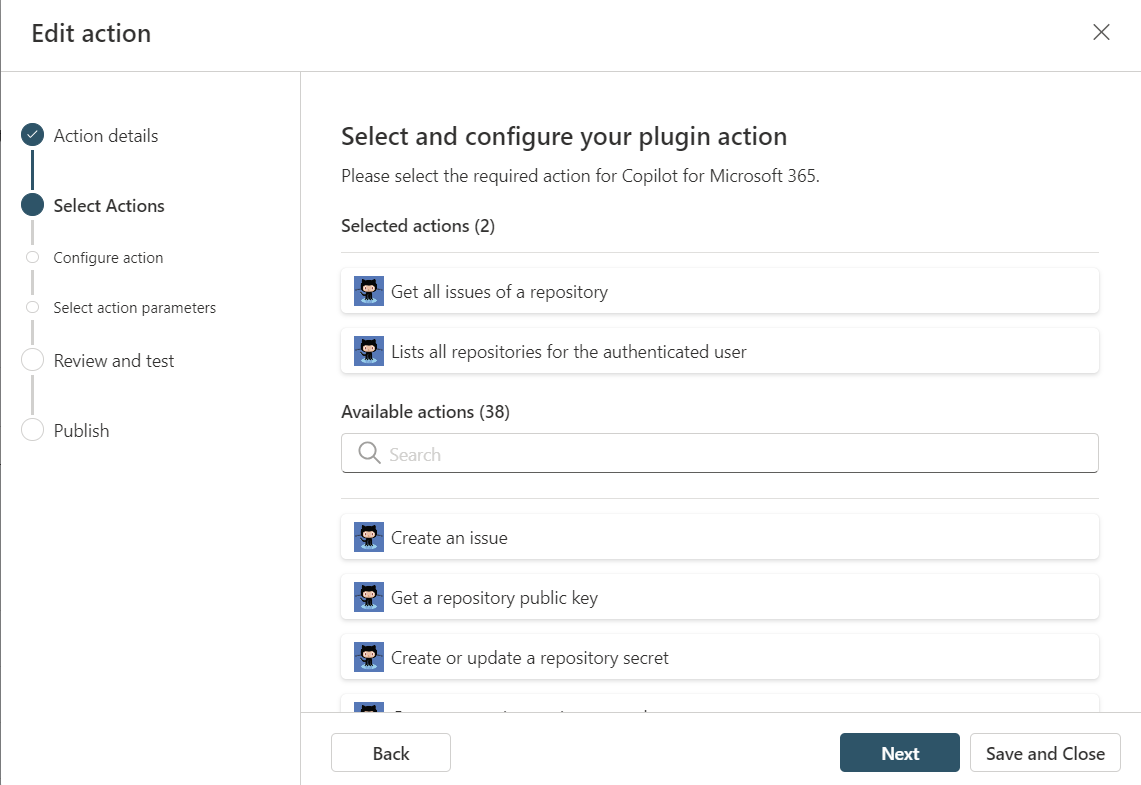
In the following screens you can select one or more actions that your Copilot action has to use, based on the connector you chose earlier. Note that the actions here are preconfigured. For this one, i chose that my action should be able to read all the issues of a repository and list all my repositories.
Now we’ve come to the Review and test screen where you have to configure a connection for your connector. Based on the connector you chose, you will have to provide a key and secret or login with an account to your data source. In this case, I had to login to my GitHub account and consent that Microsoft Power Platform (Global) can use my data from my GitHub account.
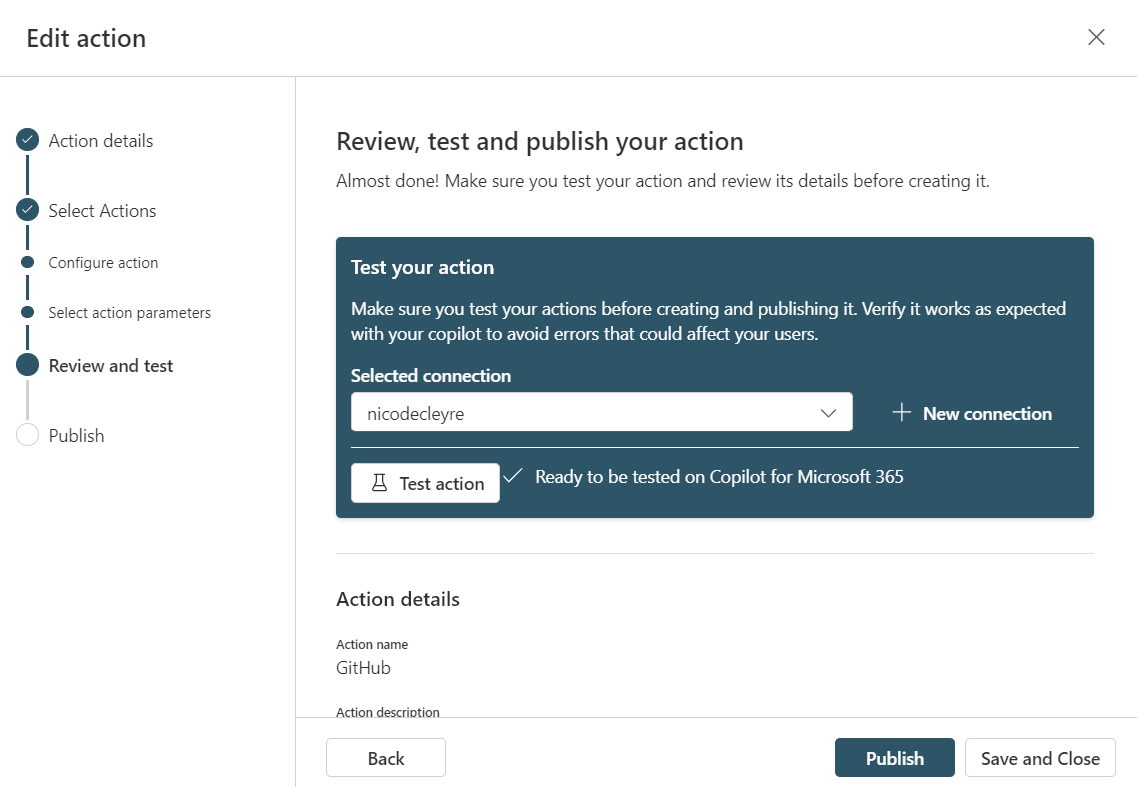
That’s it. The only thing that’s left, is to publish my Copilot action
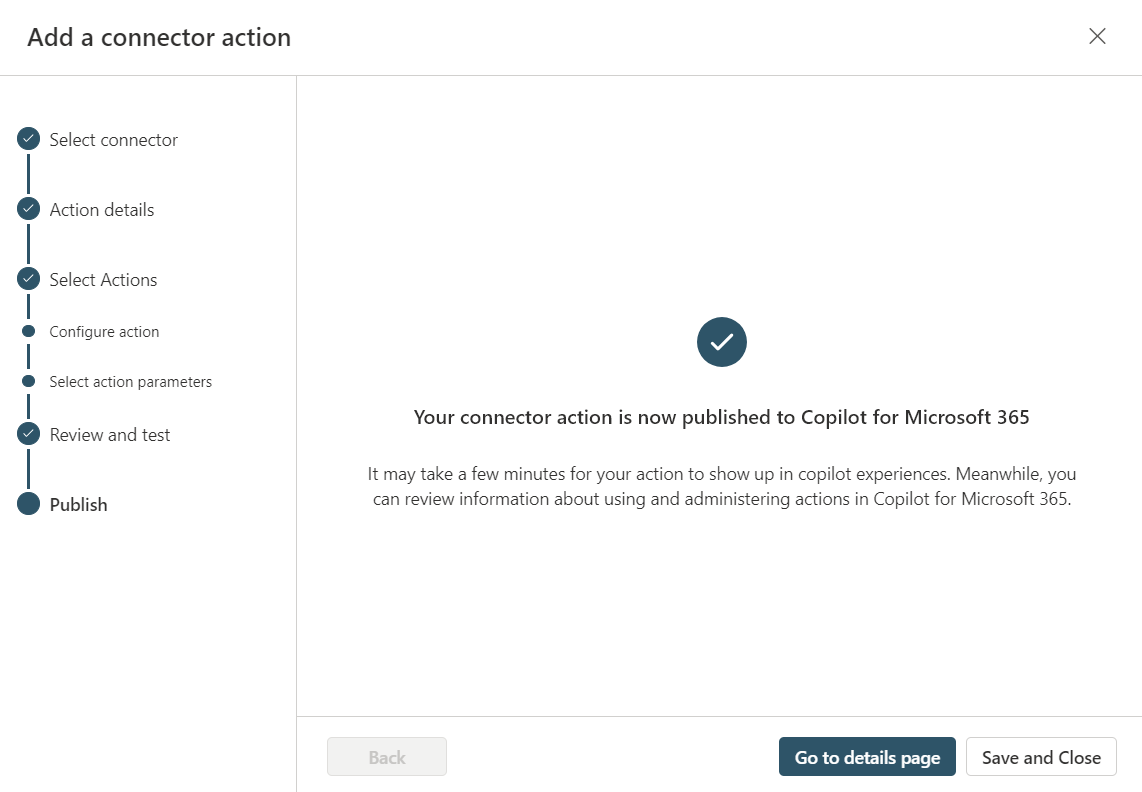
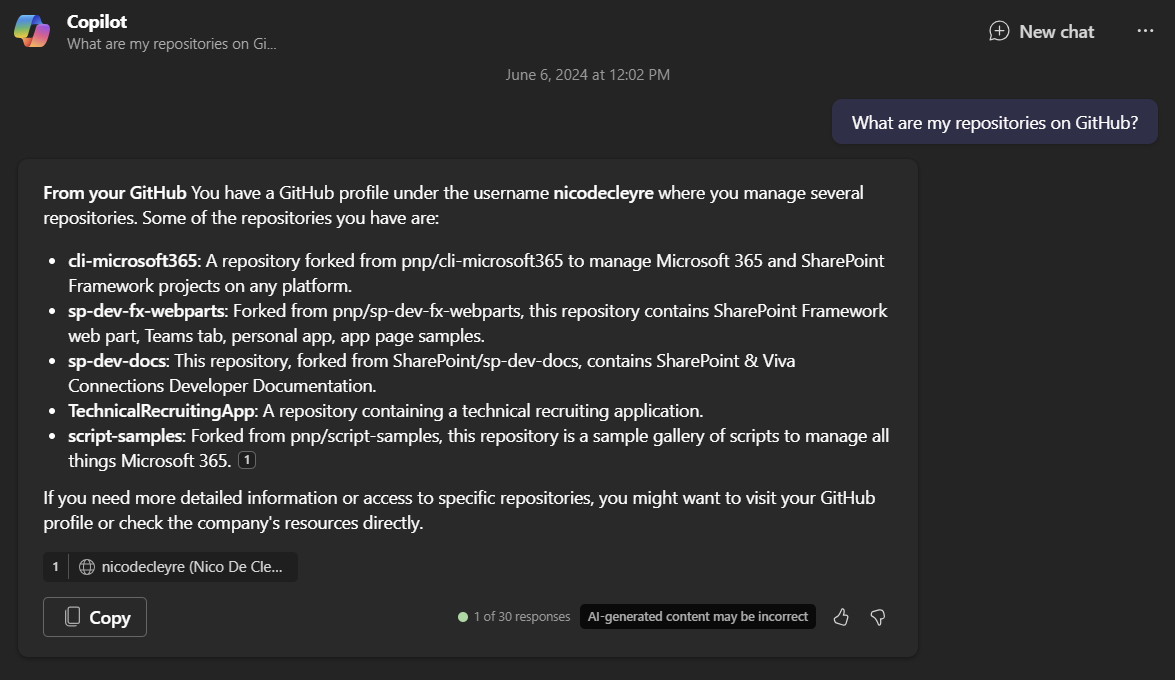
At this point, it went to the M365 (Copilot) chat in Teams and started to test my Copilot action. But to my greatest surprise, Copilot didn’t seem to find my GitHub data and at first I didn’t really understood why. Luckily there was a hero, named Daniel Laskewitz who could help me guiding me towards the fact that my Copilot action would work. Daniel asked whether I deployed my integrated app, say whut?
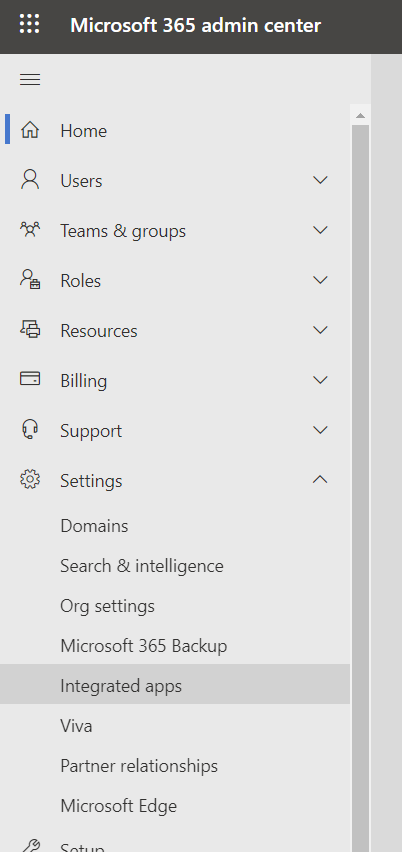
So there it was, I went to the Integrated apps under **Settings **in the Microsoft 365 admin center (be aware that you have to be a Global, Application or Exchange admin to access the Integrated app)
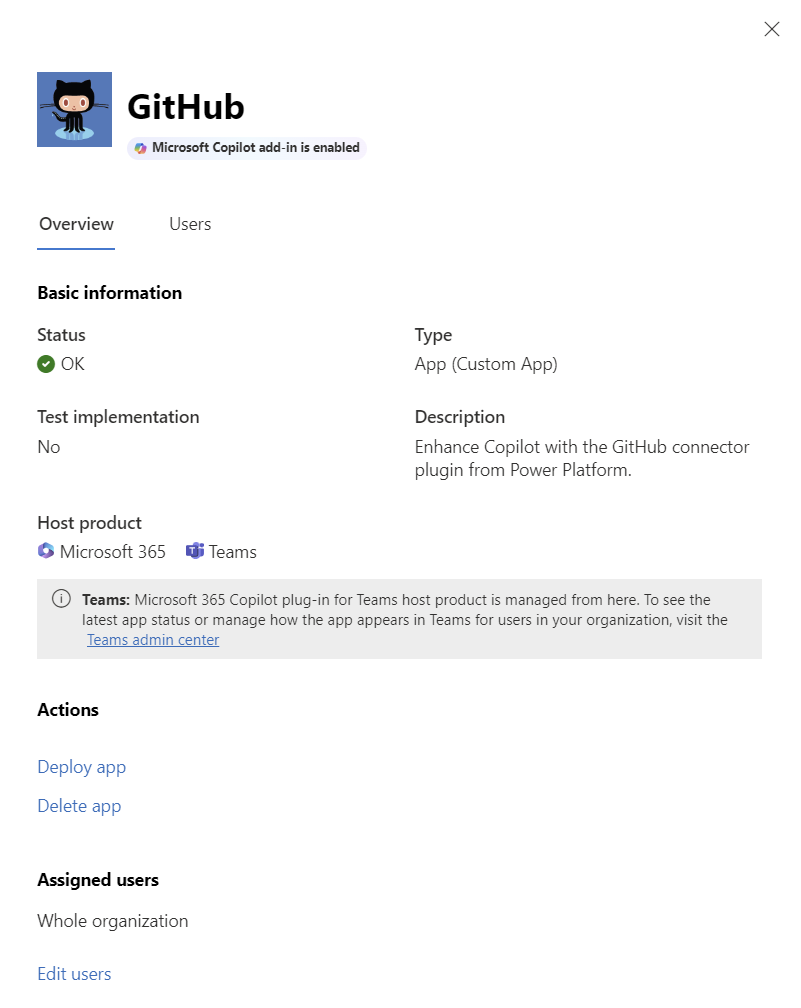
If your Copilot action is not visible in the Implemented apps, then you have to click on the tab Available apps, search for your Copilot action and click on it. From there you click on Deploy app under Actions.
Finally we can test our Copilot action, and enjoy the result of our external data being part of Copilot for Microsoft 365!