
MCP series: Building your first MCP server
Part 1, building your first MCP server
AI
Copilot
MCP server
This blogpost is the second of a series about building your MCP server, hosting it on Azure and finally implementing it in a M365 Copilot agent
In part one we built a fully functional MCP server in plain JavaScript that exposes three project management tools and supports both STDIO (for local development) and HTTP (for remote clients). Now it’s time to get it off your laptop and into Azure.
Azure Container Apps is the sweet spot for hosting an MCP server: serverless, scales to zero, HTTPS out of the box, and straightforward to deploy.
Note
This step requires Docker Desktop. Download and install it from docker.com/products/docker-desktop. After installation, start Docker Desktop and wait until the whale icon in the system tray shows “Docker Desktop is running” before running any docker commands.
Create a Dockerfile in the project root:
FROM node:20-alpine
WORKDIR /app
ENV NODE_ENV=production
COPY package*.json ./
RUN npm ci --omit=dev
COPY server.js .
EXPOSE 3000
CMD ["node", "server.js"]
Create a .dockerignore:
node_modules
.env
Build and test locally:
docker build -t my-mcp-server .
docker run -p 3000:3000 my-mcp-server
Note
Make sure the Azure CLI is installed — download it from learn.microsoft.com/cli/azure/install-azure-cli and run az login before continuing.
ACR names are globally unique across all of Azure. If az acr create returns an AlreadyInUse error, someone else has already claimed that name. Pick something distinctive . Add your name, company, or a random suffix, e.g. acrmcpnico.
$RESOURCE_GROUP = "rg-mcp-demo"
$LOCATION = "westeurope"
$ACR_NAME = "acrmcpyourname"   # Must be globally unique across all of Azure — pick something distinctive
$APP_ENV = "mcp-env"
$APP_NAME = "mcp-project-server"

az group create --name $RESOURCE_GROUP --location $LOCATION

# Register the Container Registry provider if not already done
az provider register --namespace Microsoft.ContainerRegistry

# Wait until registration is complete before continuing
az provider show --namespace Microsoft.ContainerRegistry --query "registrationState"
# Re-run the above until you see "Registered"

az acr create `
  --resource-group $RESOURCE_GROUP `
  --name $ACR_NAME `
  --sku Basic `
  --admin-enabled true

az acr login --name $ACR_NAME
docker tag my-mcp-server "$ACR_NAME.azurecr.io/my-mcp-server:latest"
docker push "$ACR_NAME.azurecr.io/my-mcp-server:latest"
az extension add --name containerapp --upgrade
az provider register --namespace Microsoft.App
az provider register --namespace Microsoft.OperationalInsights

az containerapp env create `
  --name $APP_ENV `
  --resource-group $RESOURCE_GROUP `
  --location $LOCATION

$ACR_PASSWORD = az acr credential show `
  --name $ACR_NAME `
  --query "passwords[0].value" -o tsv

az containerapp create `
  --name $APP_NAME `
  --resource-group $RESOURCE_GROUP `
  --environment $APP_ENV `
  --image "$ACR_NAME.azurecr.io/my-mcp-server:latest" `
  --registry-server "$ACR_NAME.azurecr.io" `
  --registry-username $ACR_NAME `
  --registry-password $ACR_PASSWORD `
  --target-port 3000 `
  --ingress external `
  --min-replicas 0 `
  --max-replicas 3 `
  --cpu 0.25 `
  --memory 0.5Gi `
  --env-vars NODE_ENV=production
Get your public URL:
az containerapp show `
  --name $APP_NAME `
  --resource-group $RESOURCE_GROUP `
  --query "properties.configuration.ingress.fqdn" -o tsv
Your MCP endpoint is now live at https://<your-fqdn>/mcp.
Note
The /mcp endpoint only accepts POST requests. Opening the URL in a browser triggers a GET and returns Cannot GET /mcp, that’s expected. Use the /health endpoint to verify the container is running: https://<your-fqdn>/health should return {"status":"ok"}.
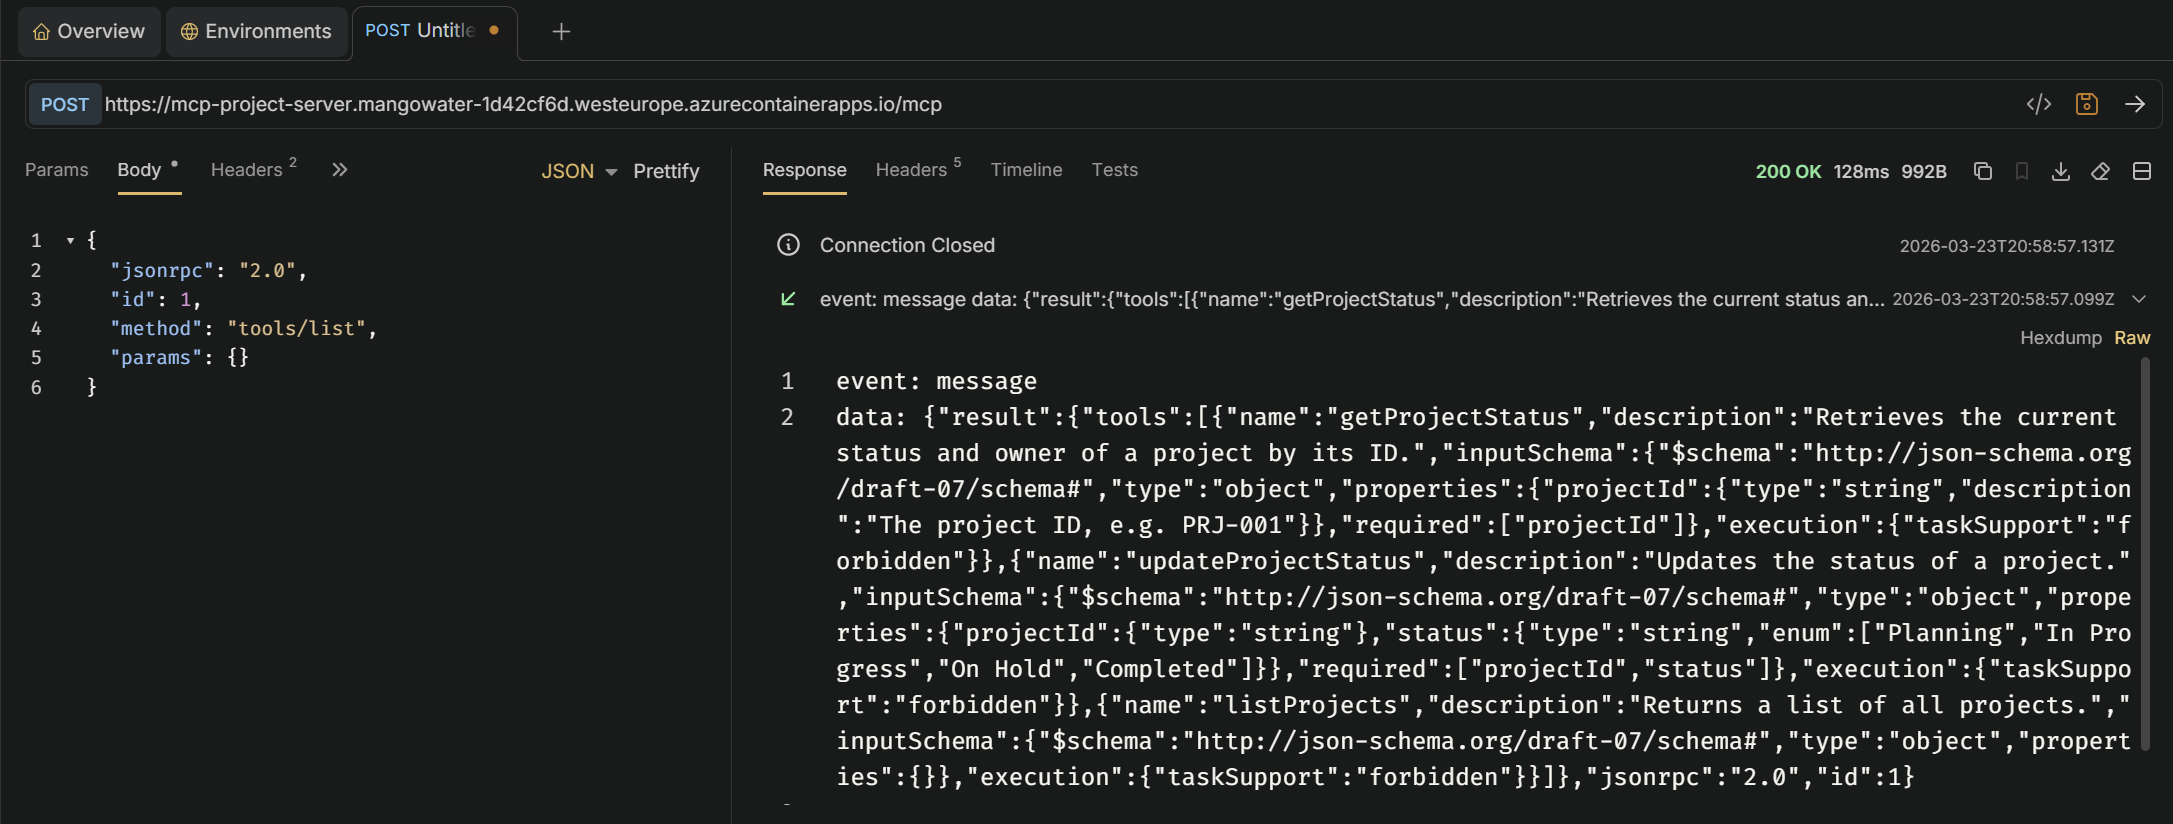
To test the MCP endpoint itself, use an API client like Bruno (open source) or Postman.
Create a new POST request with the following settings:
https://<your-fqdn>/mcpContent-Type: application/jsonAccept: application/json, text/event-stream{
"jsonrpc": "2.0",
"id": 1,
"method": "tools/list",
"params": {}
}
A successful response returns your three tools in SSE format. You can also call a specific tool:
{
  "jsonrpc": "2.0",
  "id": 2,
  "method": "tools/call",
  "params": {
    "name": "listProjects",
    "arguments": {}
  }
}
By default, your MCP endpoint is publicly accessible - anyone with the URL can call your tools. For any real deployment you’ll want to protect it with at least an API key.
Add the API key check to the MCP route. The key is read from an environment variable so it never ends up hardcoded in your source:
app.post("/mcp", async (req, res) => {
  const apiKey = req.headers["x-api-key"];

  if (!apiKey || apiKey !== process.env.MCP_API_KEY) {
    res.status(401).json({ error: "Unauthorized" });
    return;
  }

  const transport = new StreamableHTTPServerTransport({ sessionIdGenerator: undefined });
  await server.connect(transport);
  await transport.handleRequest(req, res, req.body);
  res.on("finish", () => transport.close());
});
Create a .env file in your project root (add it to .gitignore!):
MCP_API_KEY=my-local-secret
Install dotenv to load it automatically:
npm install dotenv
Add this at the top of server.js:
import "dotenv/config";
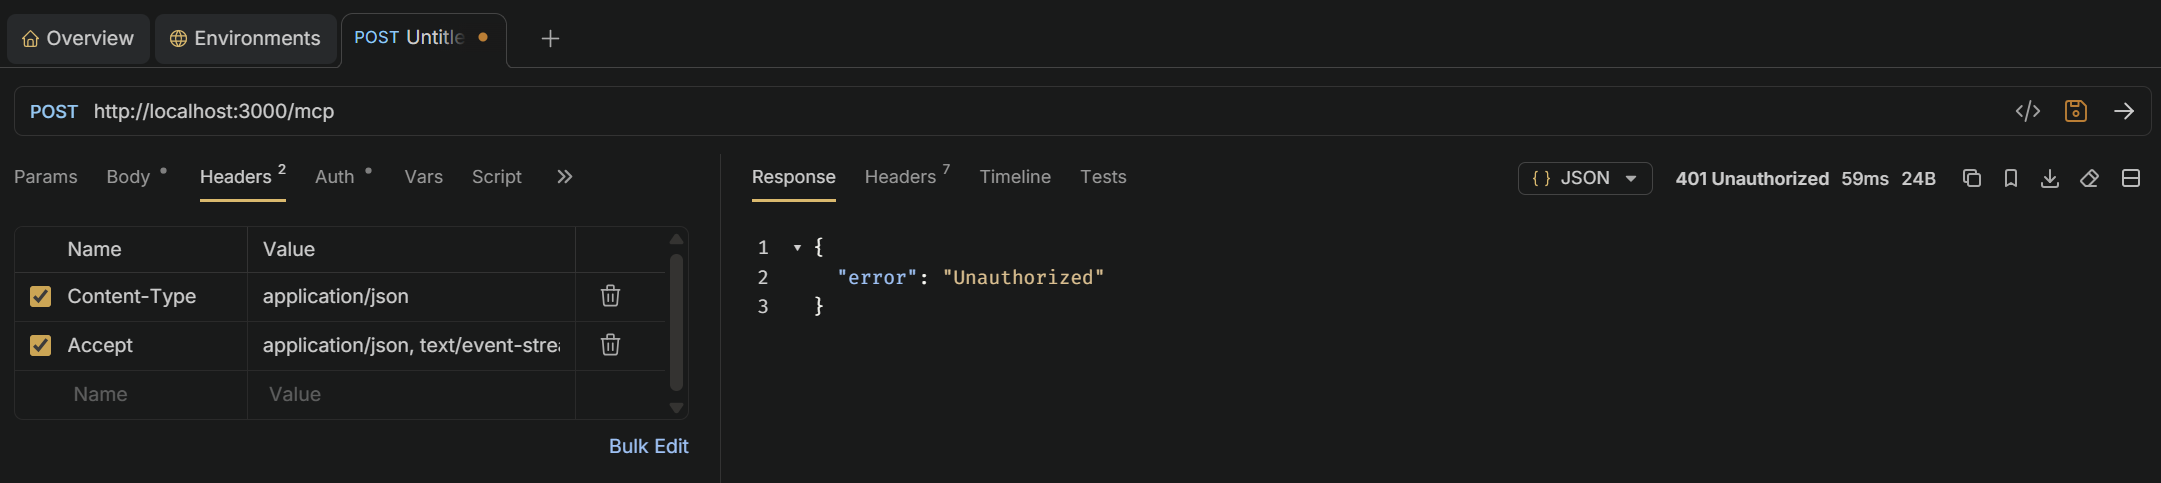
Restart the server and verify authentication works:
Without key: should return 401:
curl -N -X POST http://localhost:3000/mcp -H "Content-Type: application/json" -H "Accept: application/json, text/event-stream" -d '{"jsonrpc":"2.0","id":1,"method":"tools/list","params":{}}'
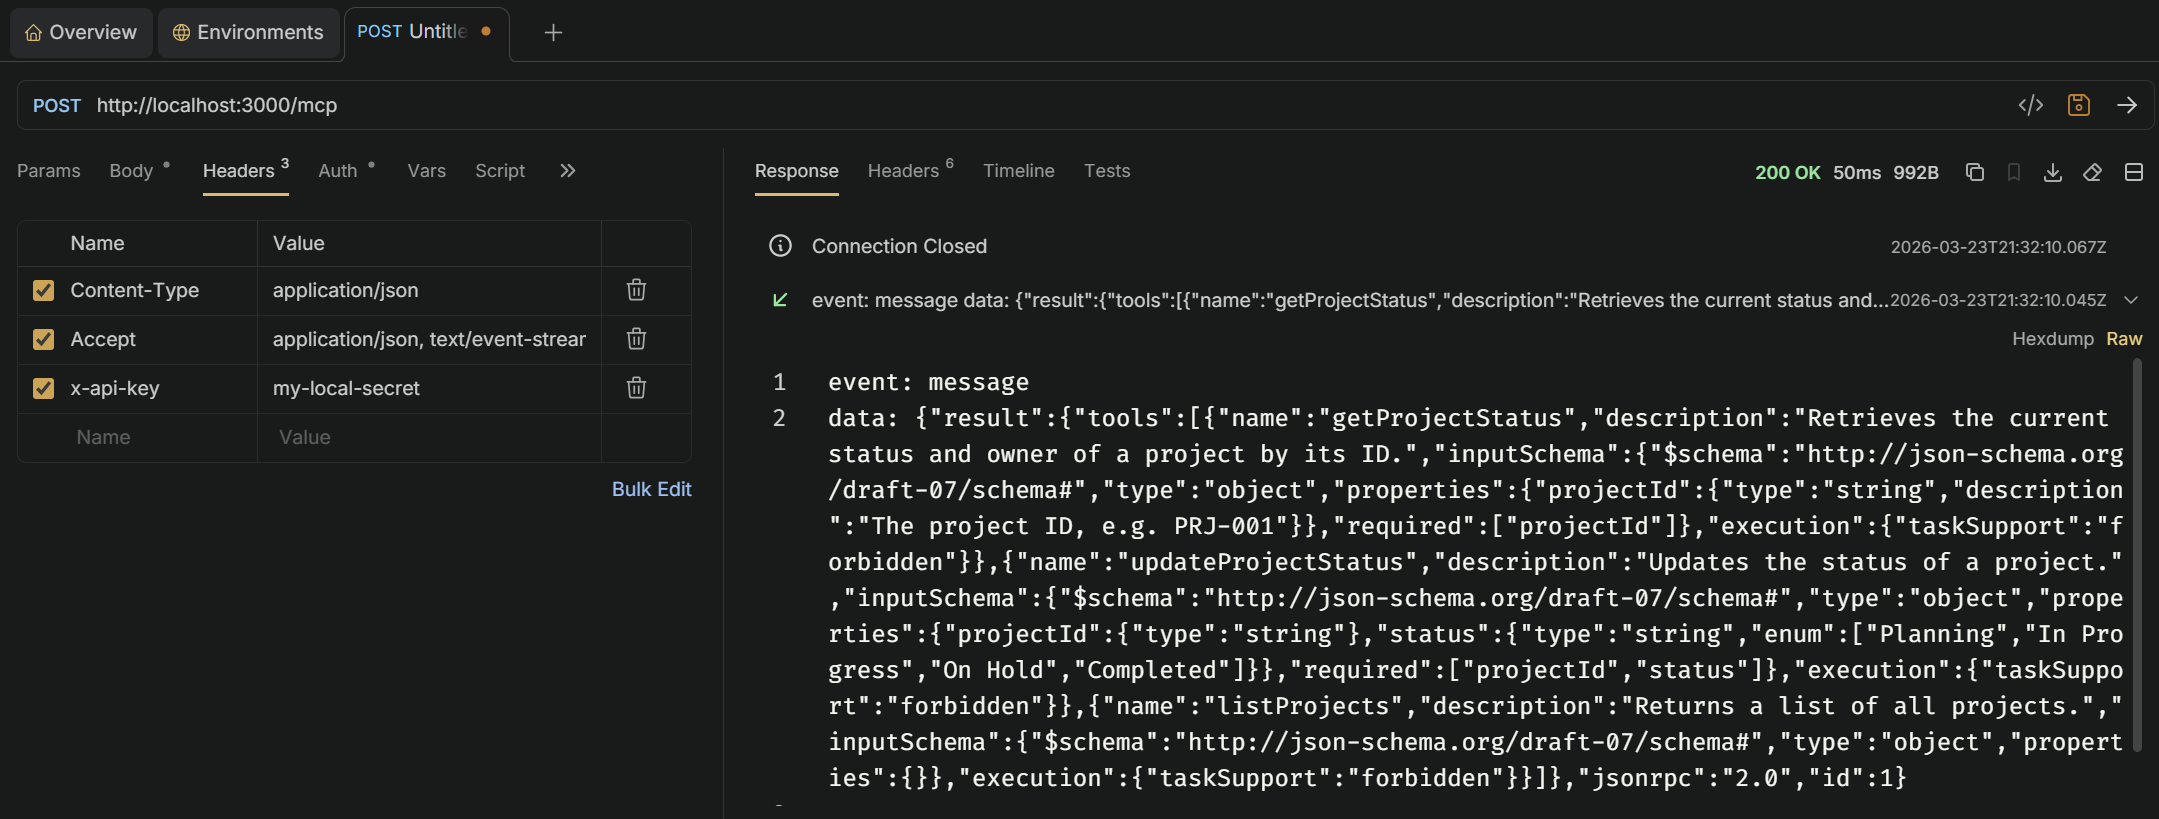
With correct key: should return the tools list:
curl -N -X POST http://localhost:3000/mcp -H "Content-Type: application/json" -H "Accept: application/json, text/event-stream" -H "x-api-key: my-local-secret" -d '{"jsonrpc":"2.0","id":1,"method":"tools/list","params":{}}'
In Bruno, add a header to your request:
| Header | Value |
|---|---|
x-api-key | my-local-secret |
Never pass secrets as plain environment variables. Use Container Apps’ built-in secret store instead:
az containerapp secret set `
  --name $APP_NAME `
  --resource-group $RESOURCE_GROUP `
  --secrets mcp-api-key=<your-production-secret>

az containerapp update `
  --name $APP_NAME `
  --resource-group $RESOURCE_GROUP `
  --set-env-vars MCP_API_KEY=secretref:mcp-api-key
The secret is stored encrypted in Azure and injected into the container at runtime - it never appears in deployment logs or az containerapp show output.
Note
For enterprise scenarios, consider placing Azure API Management in front of your Container App. APIM gives you OAuth2/Entra ID authentication, rate limiting, and full observability - all without touching your server code.
Part 1, building your first MCP server

What cool new features does Copilot Studio brings?

Learn how to create your own Conversational Copilot Action with Copilot studio

Learn how to create your own Copilot Action with Copilot studio

How do you use your Azure functions in a secure way and which authentication level do you use best?